Custom Embosser Stamps for Weddings & Branding— Links & Tips
Last week, I posted the above reel about my favorite low-waste way to add branding to my packaging. I didn’t expect the post to go viral, and it was a pleasant surprise to receive so much interest in embosser stamps. They are such a mainstay of my very niche business that I forget that most people might have never heard of one.
I use embossers with my logo to add branding to my packaging and stationery. One of my favorite uses is creating thank you notes on scrap sheets of card stock. The embossing leaves a raised impression, immediately adding a refine and luxe finish to what was previously a blank sheet of paper. It’s also an easy way for my engaged couples to DIY their own branded items for their wedding.
I got many questions about where I got my embosser and the translucent paper I’m using for packaging, so I’ve linked them below.
The exact one I use (rectangular 2x1”): https://bit.ly/3HSf163
Others I recommend (circular and rectangular):
PAPER LINK: https://bit.ly/4fZuspq
Important Things to Consider and Tips
MATERIAL THICKNESS: Always check with the shop you’re ordering from, but most handheld embossers can take up to 130# card stock in my experience. You might have a difficult getting a good impression on anything thicker. I’ve gotten questions about whether you can use the embosser on napkins, thinner vellum sheets, tissue paper, etc. and the answer is yes! I always recommend running a few tests for thinner materials, so you know how much pressure to use when clamping the embosser. Sometimes too much pressure can cause the material around the impression to wrinkle.
INTERCHANGEABLE PLATES: The good news is that once you have one embosser, you can switch out the plates as needed and can just pay for the plate instead of a whole separate embosser. Just make sure the size and brand are the same.
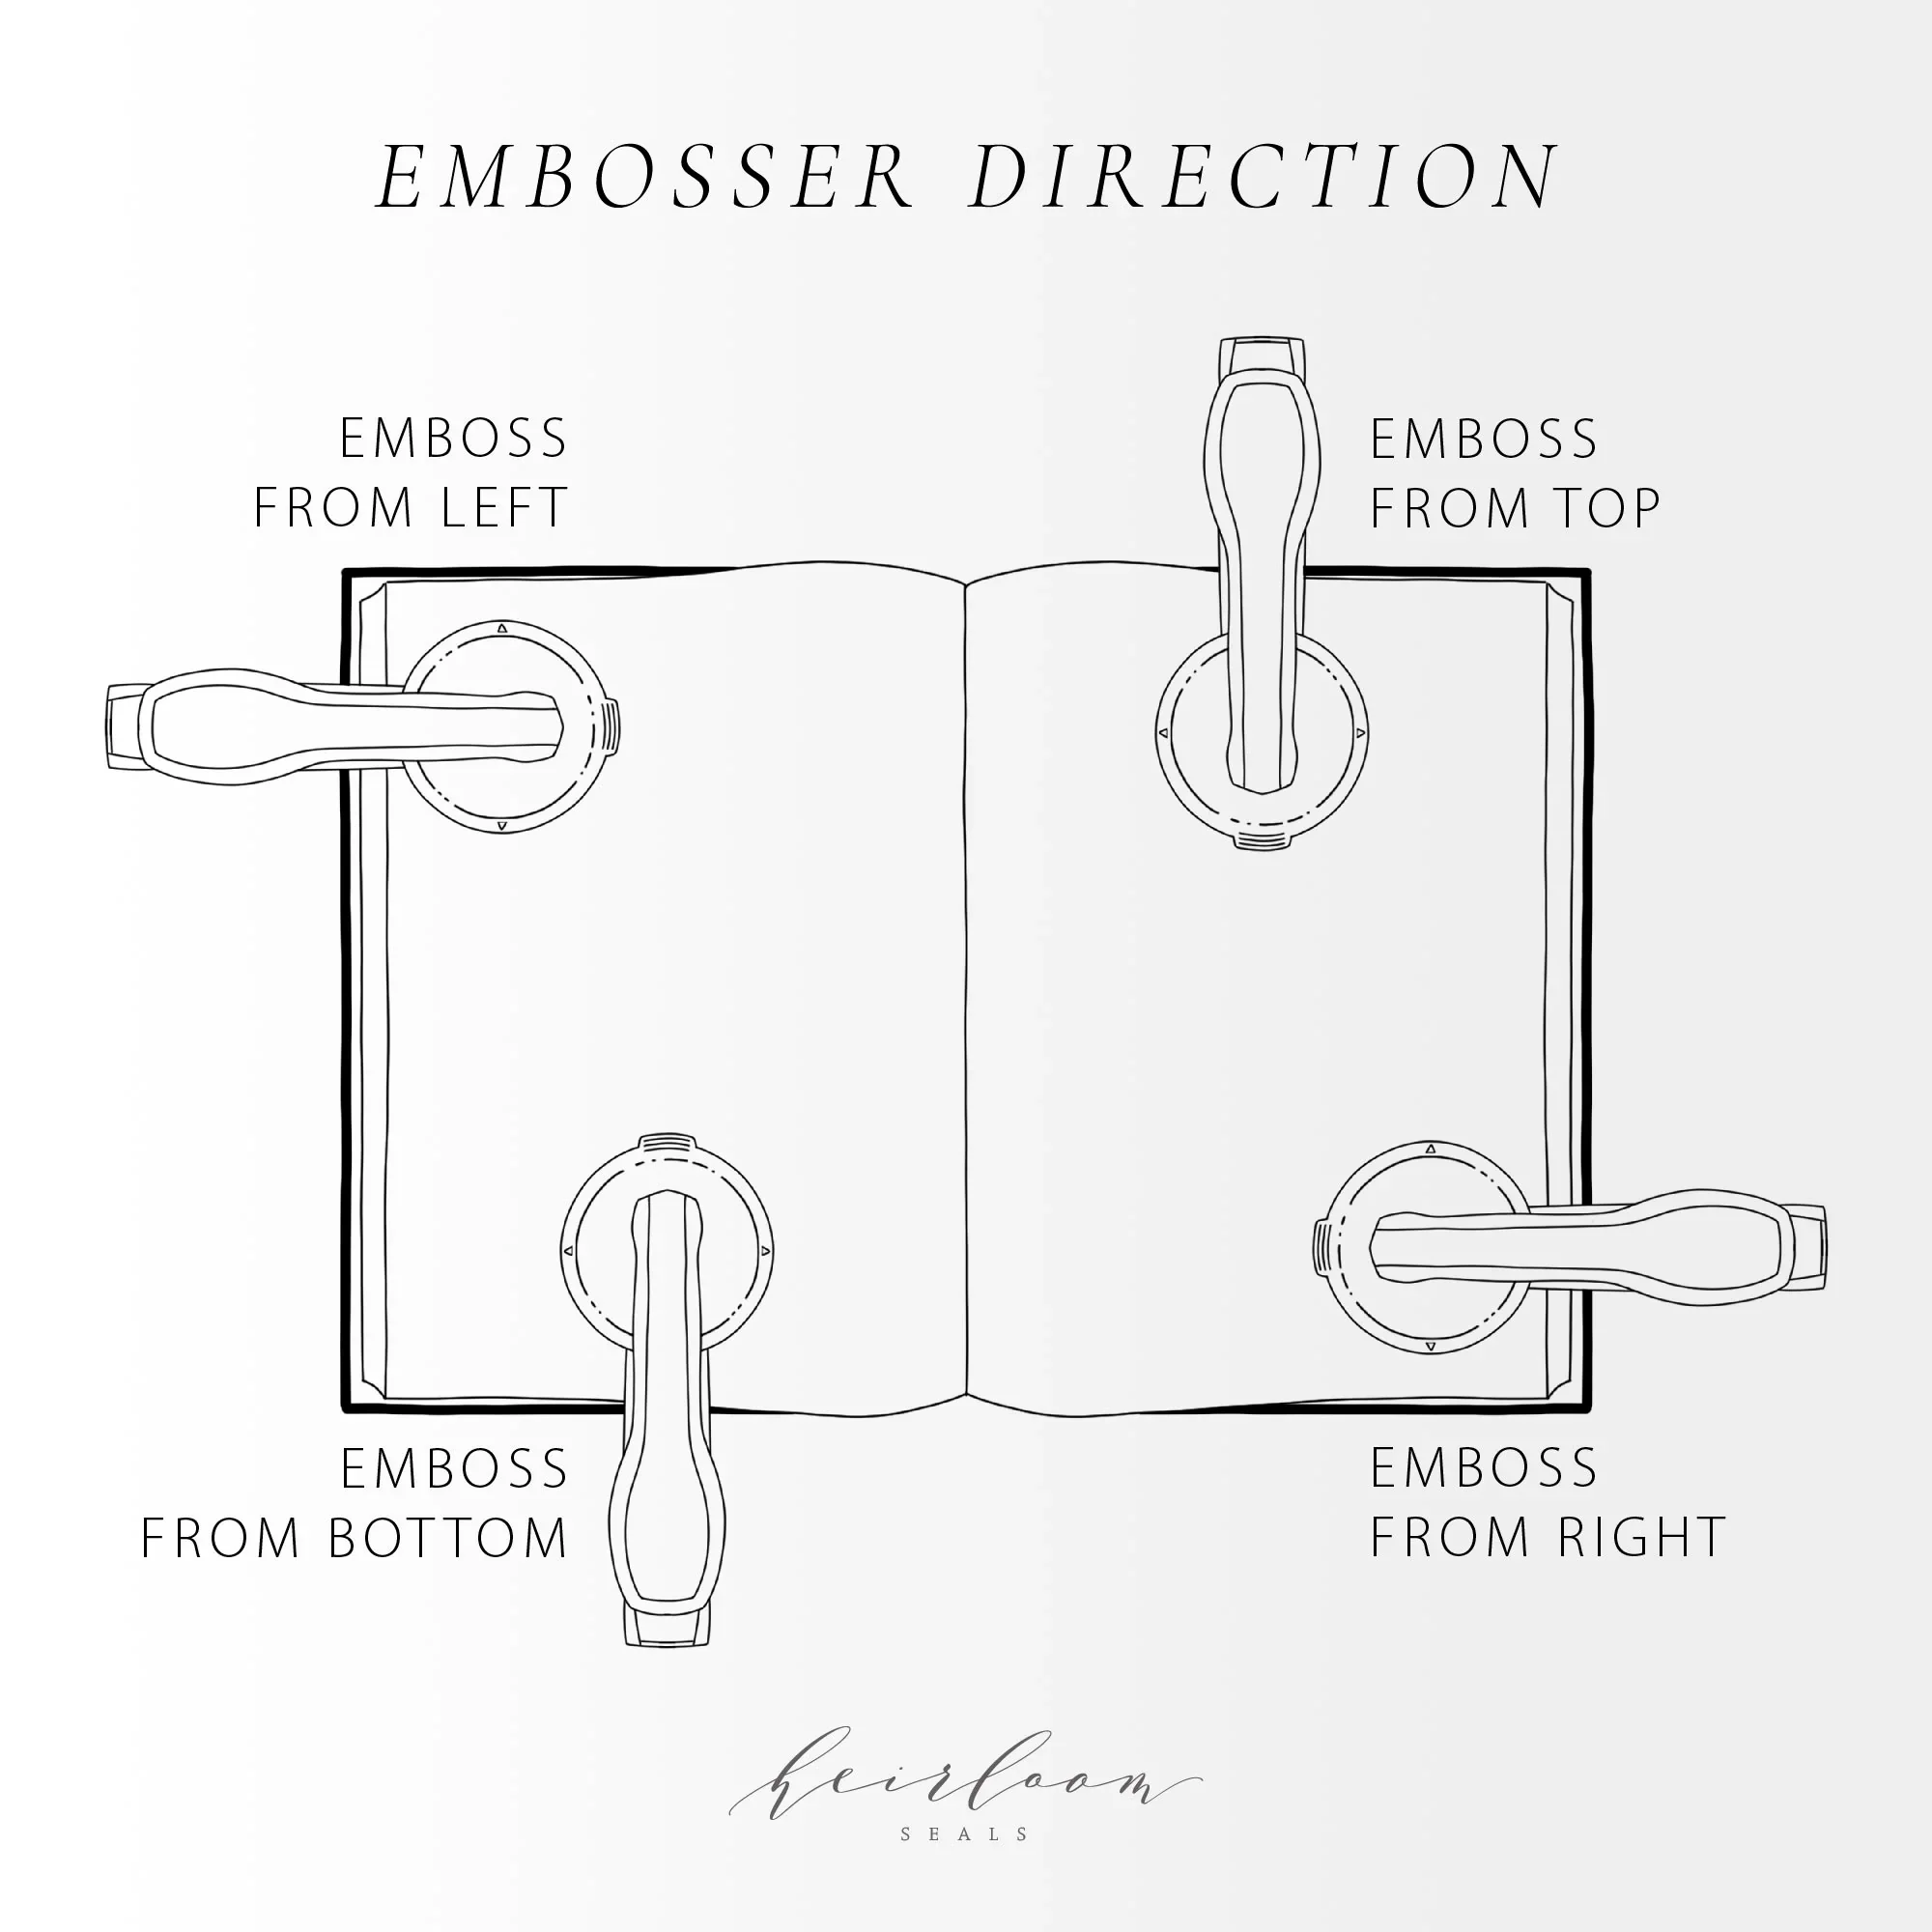
EMBOSSER ALIGNMENT: You have to commit to one orientation when ordering your embosser. You cannot emboss from more than one direction. Please see the below diagram from Heirloom Seals. For couples/businesses wanting to use the embosser on envelope flaps, you’ll want to choose to emboss from bottom. Bottom is the most popular alignment choice. For couples/businesses wanting use the embosser to create personal stationery or other items with their logo on top, you’ll want to choose to emboss from top. Smaller items like business cards, place cards, labels, favor tags, etc, can be embossed from any direction as long as the handle can reach.
Diagram via Heirloom Seals
*Please note: This post contains affiliate links, which means I may earn a small commission if you make a purchase at no extra cost to you.


